

As NFTs and metaverses are becoming more and more popular, we’ve decided to explore this topic for newbies and answer the hottest question of recent months: How can you create your first NFT?
We will use Tezos as the basis for our guide as it is one of the cheapest and most convenient blockchains for non-fungible tokens. Moreover, NFT communities, famous artists, large marketplaces, rankings, and other important components raised the Tezos ecosystem to its current level.
The simplest way to create NFTs is to use dedicated marketplaces to store, use, or trade such tokens.
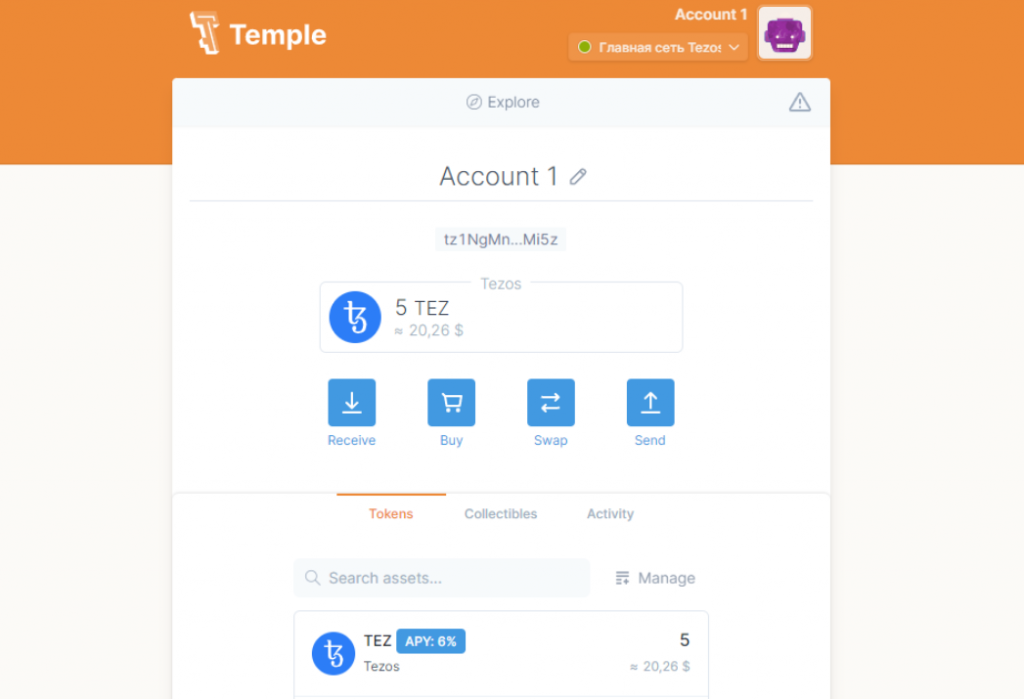
Firstly, you need to get a Tezos wallet. We recommend using the Temple Wallet, one of the main and most convenient wallets for Tezos dApps with NFT support. You must also make sure to have some TEZ in your account balance. For an NFT mint, 1-2 TEZ ($3-6) is enough. You can buy it on any crypto exchange (for example on Binance) and withdraw it to your Temple wallet address.
Let’s start with Hic et Nunc – the oldest NFT marketplace on Tezos
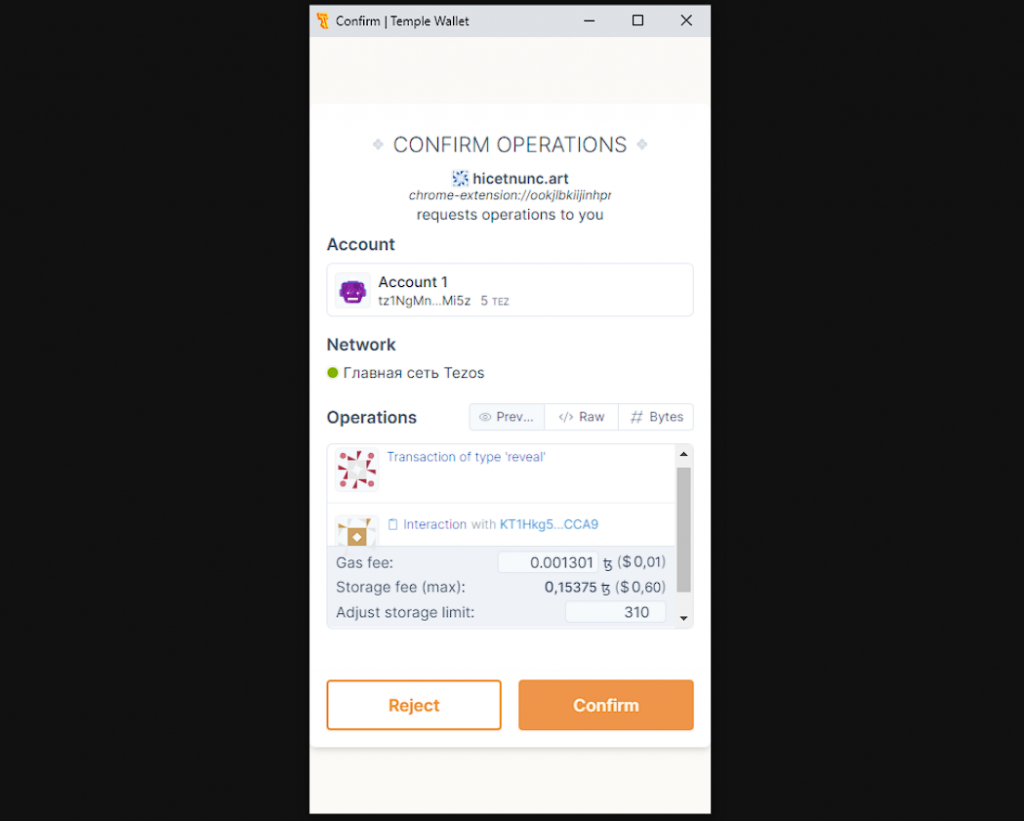
Go to hicetnunc.art and click the “sync” button in the upper right corner to connect Temple Wallet to the website, then follow the in-app instructions to proceed with the connection. You will need a certain amount of TEZ on your account to pay the network commission and storage fees.
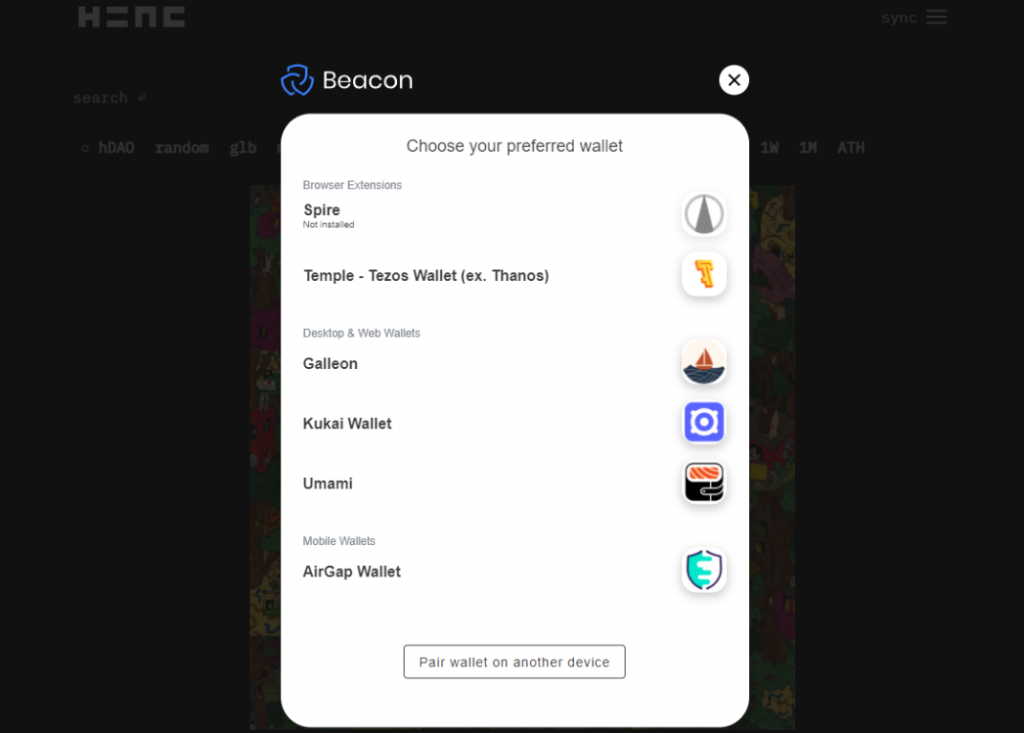
Now Temple wallet is connected to the marketplace and you can click the [OBJKTS (mint NFTs)] button on the hamburger drop-down menu to add a new token to the blockchain.
After that, you will need to fill in all the required fields, such as “Title”, “Description”, “Tags”, “Editions”, and “Royalties”.
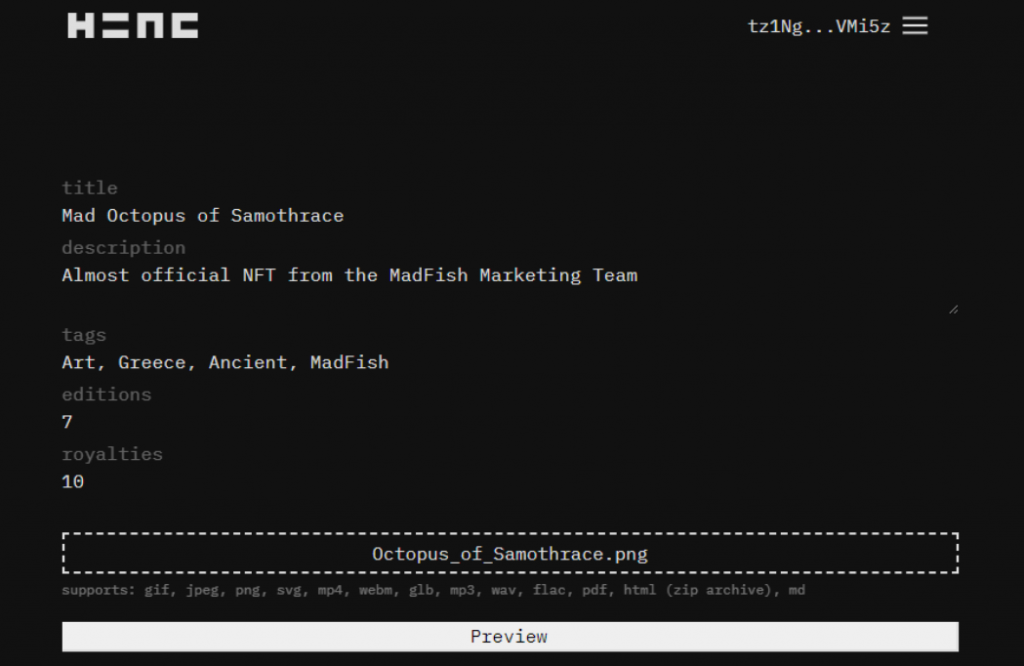
“Editions” refers to the number of tokens you want to create and “Royalties” is the percentage of each trade of your token which will be credited to your account.
Please note: you will not be able to change this data after you have signed the mint transaction.
Click Upload OBJKT and select the file you want to issue on the blockchain. Pay attention to the supported formats, which include gif, jpeg, png, svg, mp4, webm, glb, mp3, wav, flac, pdf and html (zip archive) files. In our case, we have chosen a jpeg image to create an NFT.
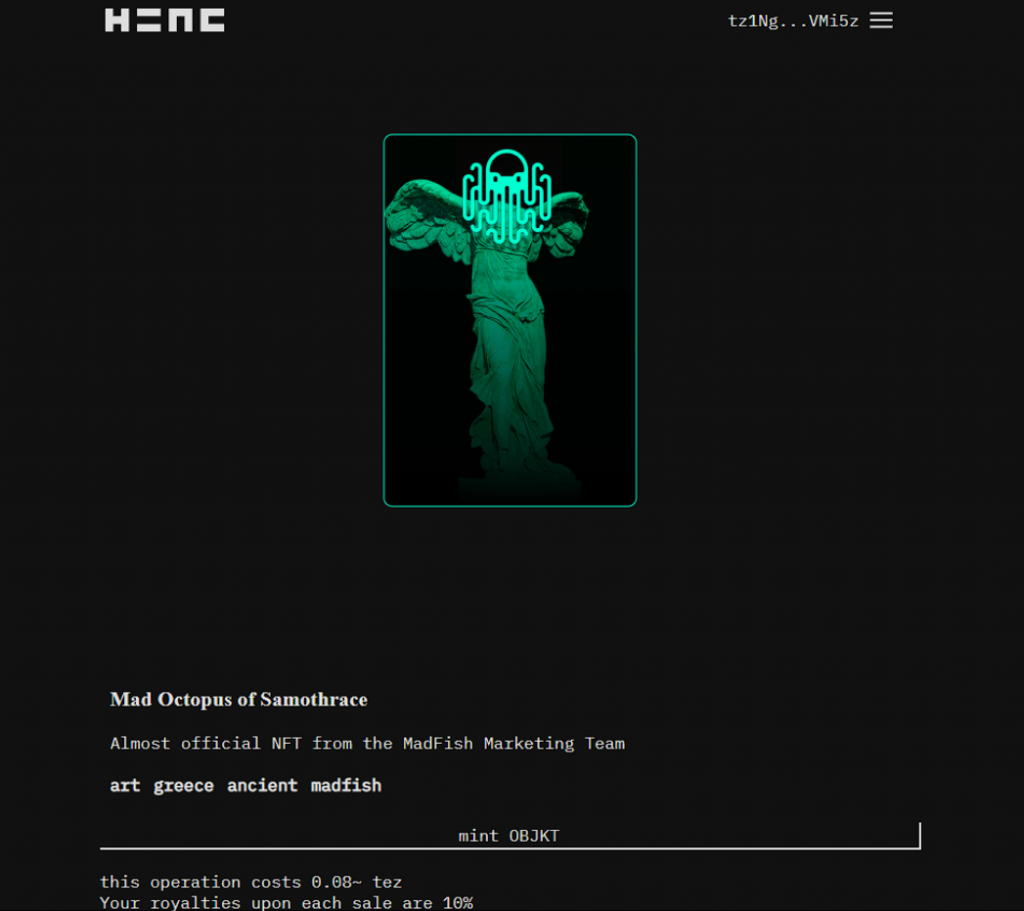
After the file is uploaded you need to click on the “Preview button” and if everything is correct can mint the NFT. You’ll find the “mint OBJKT” button down below on the Preview page. You can also check the total operation cost below the button. Confirm your transaction on Temple Wallet to complete the NFT creation process. You’re done! Congratulations on creating your first NFT on Tezos!
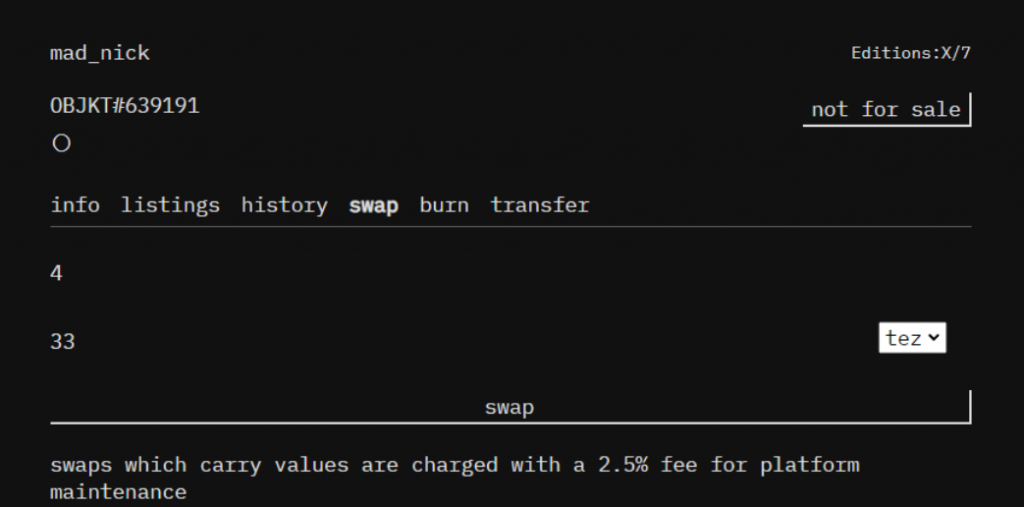
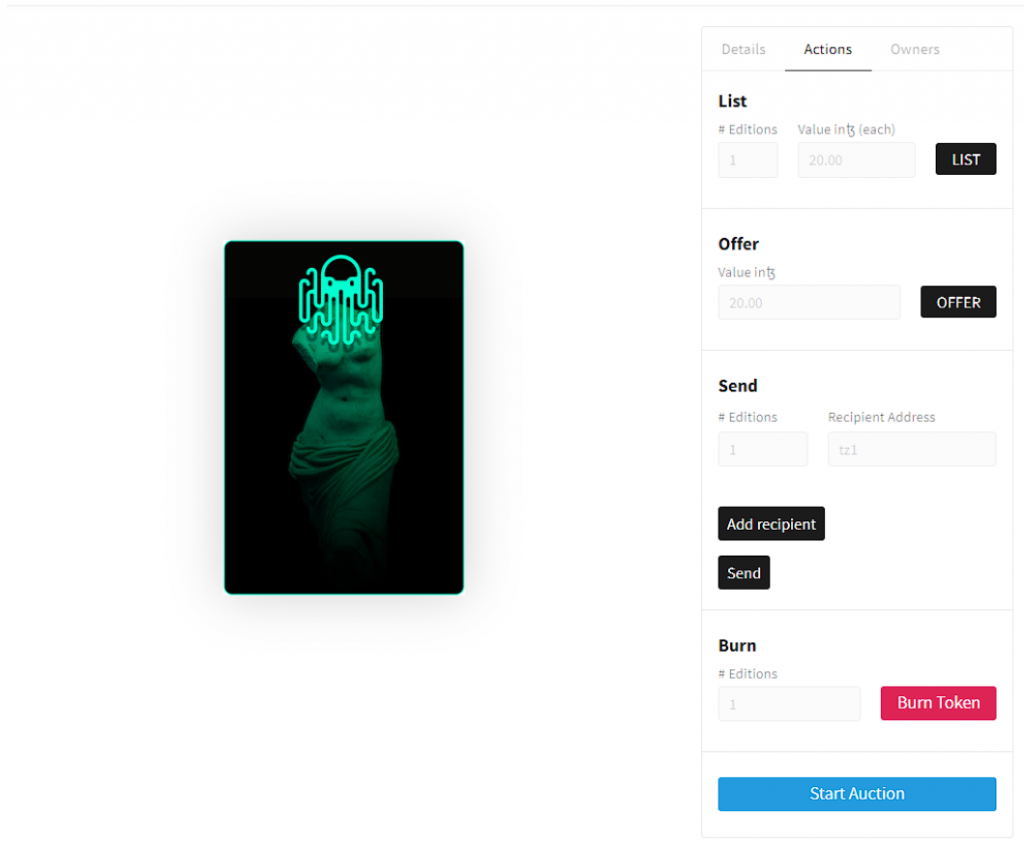
If you want to sell your tokens to other users, click on “manage assets” on the marketplace menu and select the newly created NFT under the “creations” tab. On the token page, open the “swap” tab and specify the number of tokens that you want to add to the marketplace as well as their value in tez. Pay attention to the additional commission indicated by the marketplace.
To get your NFTs to show up on the default feed on hicetnunc, you either have to set up a profile or hold some hDAO.
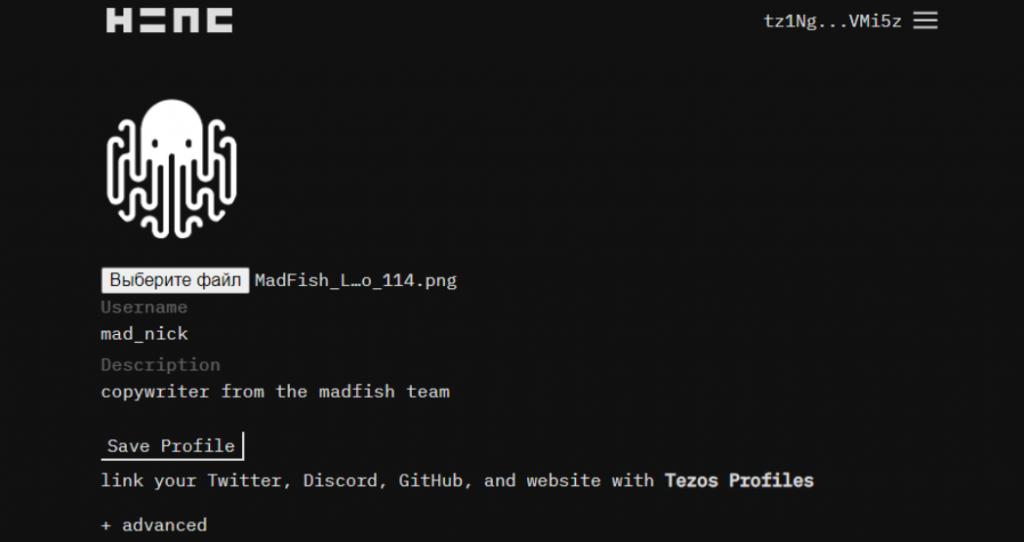
To edit your profile, select the “edit profile” option from the menu and add your profile picture, username, and profile description.
You can see the final result here.
Now let’s talk about the largest marketplace on the Tezos blockchain called OBJKT.COM.
First of all, we must note that all NFTs created on other Tezos marketplaces, purchased, and sent to your address will be available for viewing and interaction on OBJKT.COM. In addition, this platform can also be used to create new non-fungible tokens.
To get started, click “sync” in the upper right corner of the interface and connect Temple Wallet. You must then go to the “Create” section.
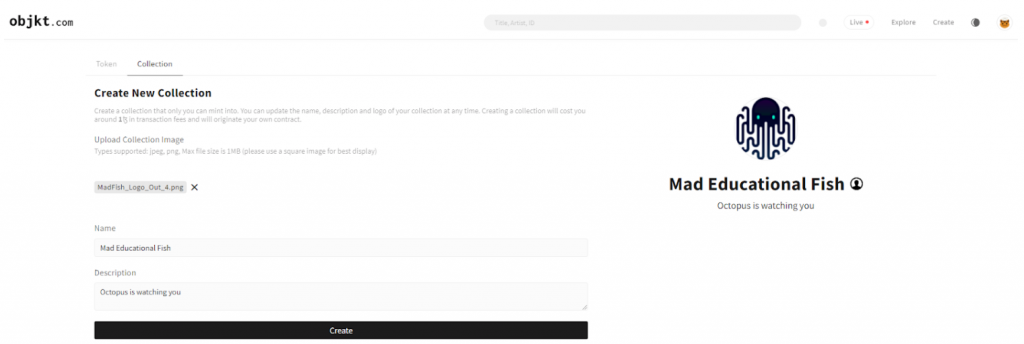
Note that OBJKT.COM will offer you the ability to create collections where you can add new NFT tokens. By creating a collection, you add a new contract to the chain that can be updated in the future.
Before you can create your own token, you will need to create your first collection. Upload your collection logo, then add its name and description. Click “Create” and confirm the transaction.
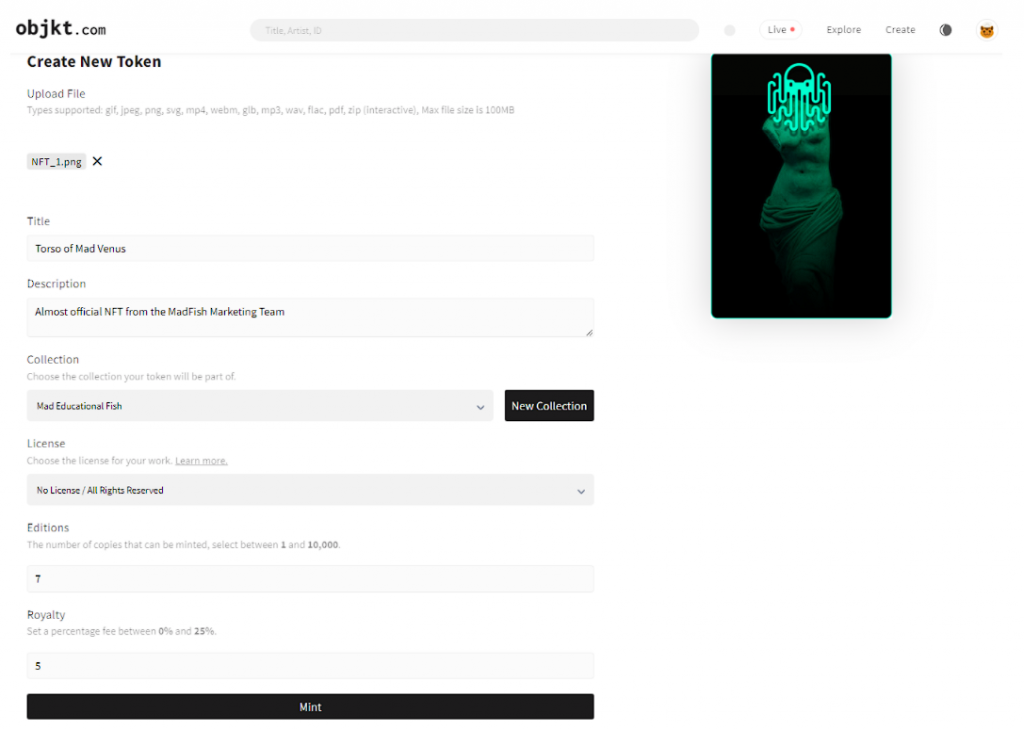
Then go to the tab for adding a new token and fill in all the fields by selecting a collection (or creating a new one). Also, do not forget to indicate the license under which you distribute the content. You must then select the number of tokens you want to issue, set the royalty on the sale, and click the “Mint” button.
You can also launch an auction. To do this, open the NFT token page, select the auction tab, and fill in the data required to start trading. You can find the auction rules in the OBJKT.COM platform documentation. There you can also set the price of the token and wait for interest from potential buyers.
You can see the final result here.
Of course, creating an NFT is not limited only to marketplaces. The very first and most basic way is to write a token contract using special software, programming languages such as Javascript (the Node.js framework), Ligo, and the blockchain explorer, BetterCallDev.
You can learn more about alternative ways to create an NFT token on the Tezos blockchain at the links below:
How to issue an NFT on Tezos from scratch — Forklog
How to create a new NFT marketplace on Tezos and mint NFTs using Taquito and Pinata — Tezos Agora
How to create NFTs on Tezos using OpenMinter — TqTezos Medium
How to create non-fungible tokens on Tezos Using FA2 — GitHub