

So, one of the most important updates with v3 DEX contracts for QuipuSwap already came. It brought incredibly high capital efficiency that changed the monetization approach compared to traditional DEXs.
The v3 model only allows users to earn significant fees by providing liquidity instead of using LP shares in various incentivization programs (aka farms). You can learn more about all the changes of v3 compared to v1/v2 DEX contracts and why it is so important from this article 1 and article 2.
But let’s explore how these new features can be used and how to start working with them.
How to Add Concentrated Liquidity to an Existing QuipuSwap v3 pool?
Go to the Liquidity section, activate the “v3” parameter in filter settings, and choose the pair you want to provide liquidity to. On v3 pools, instead of the classical interface, you will see an updated screen with the “Create new position” button. Click on it to open the position creation screen.
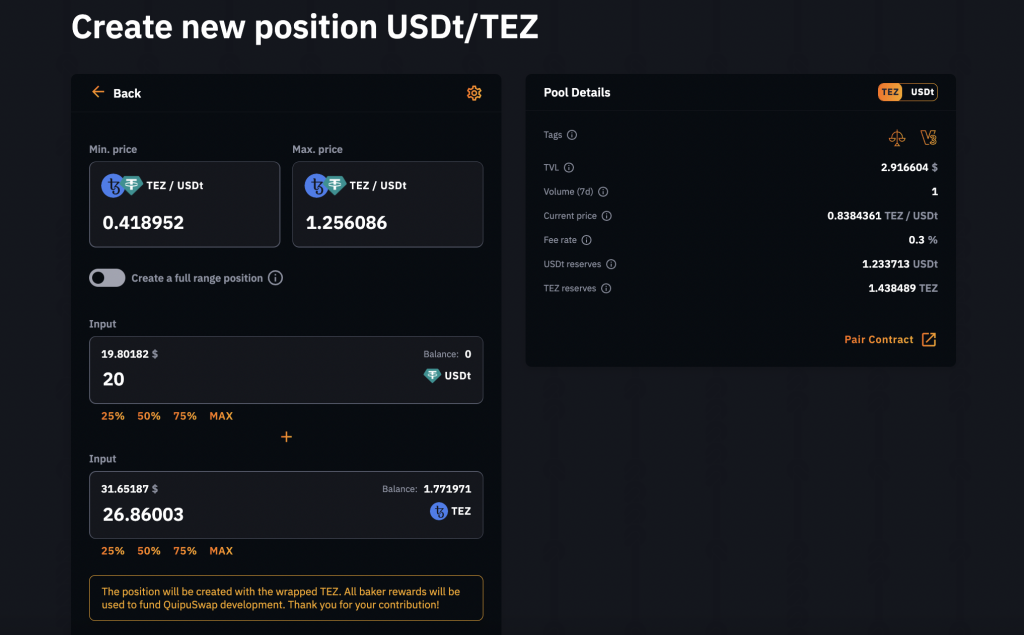
Here you can set up the price range for trades in a selected diapason. It will make your liquidity be used only for trades inside this price frame.
Pay attention: The smaller the range, the more commission you will earn for trading within that range. Accordingly, the larger the range, the less commission you will get. Here is where the “More risk = move profit” rule works.
At the Pool Details window (right side of your screen), you can see the current price of Asset A related to Asset B. It can help you set up your price range, considering the current ratio of asset prices.
After setting up the range, fill in an amount of the first asset to the input field (the amount of the second asset will be calculated automatically, according to the current price), and click Create. Finally, confirm the operation in your wallet.
Advice: You can still create a position with a full price range which means your liquidity will be used for all trades. It makes the position less risky but also less profitable.

Clicking by “View Details,” you will see additional information about your position stats, such as the number of tokens it has and earned fees in each of them.
What happens if the price crosses your price borders?
For example, you created TEZ/USDt liquidity position and set the price range for the TEZ. In this example, we call TEZ “Asset A” and USDt “Asset B.” Here is what will happen if the TEZ price crosses your price range:
If the price crosses the Min. price level, all your assets will be converted into Asset A (TEZ). But If the price crosses the Max price level, all your assets will be converted into Asset B (USDt). In both cases, your liquidity won’t be used for further trades outside the previously selected range. But if the price is back to this range, your liquidity will be used again.
How to Withdraw Liquidity
To remove your tokens from your active liquidity position, you need to find the appropriate pool in the Liquidity section and click on it. Open the Remove tab. In the Amount field, you can fill in how much liquidity you want to withdraw. Then, in two Output fields, you will see the number of tokens you will receive after withdrawing.
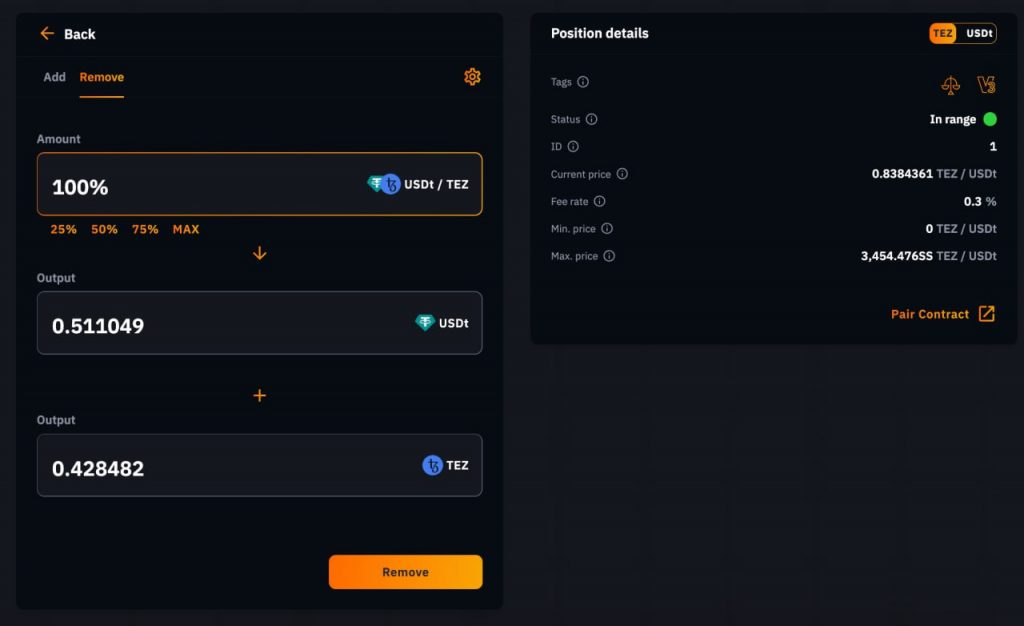
Liquidity Withdrawal – QuipuSwap v3
Fill in the amount of liquidity you want to withdraw and click the “Remove” button. Finally, confirm your transaction in a wallet.
How to Create a New Pool
Go to the Liquidity section to create a pool with a new pair of tokens and set up a custom fee. Then, under the “Hot Pools” tab, click on the “Create Pool” button. Here you will see three options for pool creation.
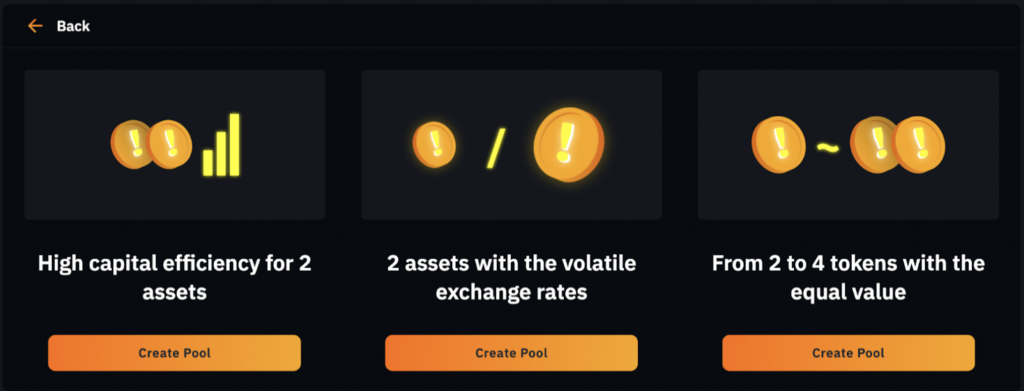
To create a new v3 pool, click Create Pool under the first option, “High capital efficiency for two assets.” Next, select the tokens you want to create a pool with, set up the initial price ratio, and go to the Fee rates section.
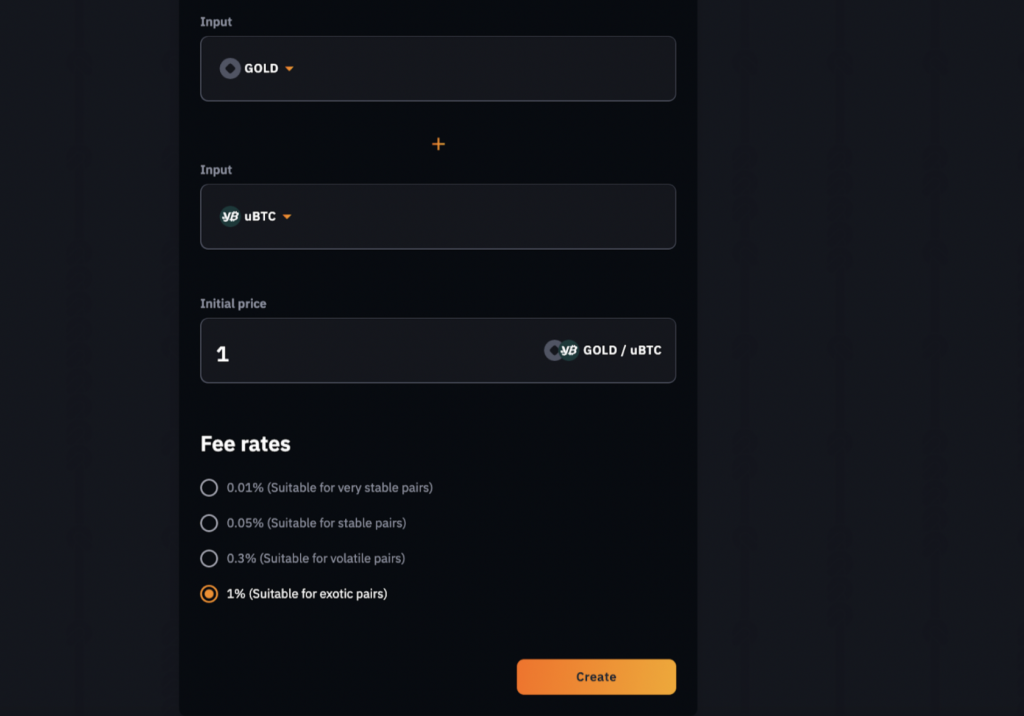
Here you can choose a fee parameter from 4 available options. Use the tips to set up fair fees for trades through your pool. Then, click Create and confirm a transaction.
Pay attention: You can create a pool of a token pair only with a fee that hasn’t yet been set.
After pool creation, you will be moved to the “Create new position TokenA/TokenB” page. Create a liquidity position following the recommendations from the “How to add concentrated liquidity to an existing QuipuSwap v3 pool” section of this guide to add initial liquidity to a recently created pool.
Now you can find your pool in the Liquidity section on a QuipuSwap.
About farming
As you may know, after the v3 release, your liquidity shares have another token format. It is similar to NFT, where every LP token has unique information (because of the custom price range). So it’s impossible to use them in classical farms already presented on QuipuSwap.
But at the same time, because of the capital efficiency growth, liquidity providers can earn even more profit only by providing liquidity. So, there is something new for users who’ve never used v3 DEXs. But it works and works very well.
When we create special farms for v3 pools, we’ll inform you about that. That’s why we recommend you follow our official Telegram and Discord communities. And, of course, we’ll be glad to assist you with QuipuSwap v3 onboarding 🙂
Good luck, guys ❤️